.png)
The integrity of a gas analysis process is fundamentally dependent on the quality of its gas sampling system. An improperly designed or maintained system can deliver a non-representative sample to the analyzer, rendering the resulting data inaccurate and misleading. This can lead to severe consequences, including compromised industrial safety, inefficient process control, and non-compliance with environmental regulations.
We will explore seven key design flaws in gas sampling systems that can severely impact system performance. These flaws are based on fundamental scientific principles of gas physics and chemistry, such as phase transitions, material compatibility, and fluid dynamics. By dissecting these common defects—from neglecting the physical properties of gases to poor system integration—we provide a structured framework for designing, operating, and maintaining robust gas sampling systems.
Our goal is to help you deepen your understanding of systems as integrated scientific instruments, ensuring that they can provide timely and representative samples to the analyzer for accurate and reliable measurements.

Mistake #1: Ignoring the Physical and Chemical Properties of the Gas Sample
One of the most fundamental errors in the design of a gas sampling system is a failure to deeply consider the very nature of the substance being measured. It is tempting to view the system as mere plumbing, a simple conduit from the process to the analyzer. This perspective is a recipe for failure.
A gas sampling system is more akin to the circulatory system of a patient from whom a doctor is drawing blood. The sample must arrive at the laboratory—the analyzer—in a state that is identical to its condition inside the patient, or the process. If the sample changes along the way, the diagnosis will be wrong. To achieve this, we must first become students of the gas itself, understanding its physical and chemical dispositions.
The Perils of Phase Changes: Condensation and Vaporization
Every gas mixture has a dew point, a critical temperature below which certain components will begin to condense into liquid. Imagine a cold window on a humid day; water vapor in the air, upon touching the cold glass, turns into liquid water droplets. The same phenomenon occurs inside the sample lines of a gas sampling system if the temperature of the tubing drops below the sample’s dew point.
When a component condenses, it is effectively removed from the gas phase. The analyzer, which only measures the gas that reaches it, will report a lower concentration of that component than is actually present in the process. For instance, if you are measuring water vapor (H₂O) in a natural gas stream and the sample line is too cold, water will condense, and the analyzer will show a deceptively low moisture content. This could lead to the formation of corrosive acids or solid hydrates downstream, causing significant operational problems.
Conversely, if the process stream contains liquids that are near their boiling point, a drop in pressure within the gas sampling system can cause them to flash-vaporize. This introduces components into the gas sample that were not in the gas phase within the process, again leading to an inaccurate analysis. The core principle is that the sample must be maintained in a single, stable phase—typically the gas phase—throughout its entire journey. This often requires heated sample lines, heated enclosures for components, and careful pressure management to steer clear of the dew point.
Reactivity and Adsorption: The Sticky Molecule Problem
Not all molecules are created equal in their social behavior. Some, like nitrogen or argon, are relatively inert and travel through a system without much interaction. Others are far more “sticky” or reactive. Compounds like ammonia (NH₃), hydrogen sulfide (H₂S), and sulfur dioxide (SO₂) are notorious for their tendency to adsorb, or cling, to the interior surfaces of sample lines, filters, and regulators.
Think of it like trying to pour honey through a long, narrow tube. A significant amount of honey will coat the inside of the tube, and the flow out of the end will be delayed and diminished at first. Similarly, when a process change causes a spike in the concentration of a reactive gas, these “sticky” molecules will first saturate the surfaces of the gas sampling system before they reach the analyzer. This results in a slow, dampened response, making it appear as if the process change is happening gradually when it might be happening very quickly.
Later, if the concentration in the process drops, these adsorbed molecules can desorb from the surfaces, artificially elevating the reading at the analyzer. This creates a “memory effect” that obscures the true, real-time condition of the process. The solution lies in choosing appropriate materials and keeping sample lines as short and clean as possible.
Corrosivity: When the Sample Fights Back
A gas sample can be an aggressive agent, actively attacking the components of the system designed to transport it. Gases like hydrogen chloride (HCl), chlorine (Cl₂), or wet sulfur compounds can corrode common materials like stainless steel. This corrosion does two detrimental things. First, it can damage components, leading to leaks that allow the sample to escape or ambient air to enter, contaminating the measurement. Second, the corrosion process itself consumes the corrosive gas, lowering its concentration before it reaches the analyzer. The corrosion byproducts can also create new particulate matter that can clog the system.
A proper gas sampling system design begins with a complete chemical inventory of the sample stream, including trace components that may be highly corrosive. This knowledge dictates the selection of materials for all wetted parts—any surface that comes into contact with the sample. While 316 stainless steel is a common choice, it is not a universal solution. For highly corrosive applications, more exotic alloys like Hastelloy or Monel, or even non-metallic materials like PFA, may be necessary to ensure the long-term integrity and accuracy of the system (Fuśnik et al., 2022).


Mistake #2: Miscalculating Sample Transport Time
In process control and safety monitoring, time is not just money; it is the very currency of relevance. An analysis that arrives too late is an analysis of a historical event, not a current reality. A critical error in design is failing to ensure the gas sample is transported from the process tap to the analyzer within a required timeframe. This total delay is often called lag time. A long lag time means that by the time the control room operator sees a process upset, the process may have already drifted into a critical or dangerous state.
Imagine driving a car where there is a five-second delay between turning the steering wheel and the wheels actually changing direction. It would be nearly impossible to stay on the road. The same is true for process control based on delayed analytical data. The goal of the gas sampling system designer is to minimize this delay to provide a near-real-time representation of the process conditions.
The “Time is Money” Principle in Gas Analysis
The acceptable lag time is dictated by the process itself. For a slow-moving process, like monitoring the composition of gas in a large storage tank, a lag time of a few minutes might be acceptable. However, for a fast-reacting chemical process or a safety-critical emissions monitoring application, the lag time may need to be less than 20 seconds. The design must begin with this question: “How quickly do we need to know?”
The answer determines many design parameters of the gas sampling system, including the diameter of the tubing, the required flow rate, and the selection of components. Ignoring this question from the outset is like building a car without knowing if it’s meant for a leisurely Sunday drive or a Formula 1 race. The consequences of excessive lag time include inefficient use of raw materials, production of off-spec product, and, in the worst cases, the inability to respond to a safety hazard before it escalates.
Calculating Lag Time: A Practical Approach
Calculating the lag time of a gas sampling system is a straightforward application of physics, but it is a step that is surprisingly often overlooked. The fundamental relationship is:
Lag Time = Internal Volume / Flow Rate
To perform this calculation, you must sum the internal volumes of every component in the sample’s path—the tubing, filters, regulators, and any other conditioning elements. The volume of the tubing is typically the largest contributor. The formula for the internal volume of the tubing is:
Tubing Volume = π × (Internal Radius)² × Length
Let’s consider a mental exercise. Suppose you have a system with 100 feet (approximately 30.5 meters) of 1/4-inch (internal diameter of roughly 0.18 inches or 4.57 mm) tubing. The internal volume of this tubing alone is about 78 cubic inches (1.28 liters). If your analyzer requires a flow rate of 1 liter per minute, the lag time just from the tubing would be 1.28 minutes, or 77 seconds. For many processes, this is already far too long. This simple calculation demonstrates how quickly lag time can accumulate.
To reduce this lag time, you have two primary levers: decrease the volume or increase the flow rate. Decreasing the volume is often best achieved by using smaller-diameter tubing. Switching from 1/4-inch to 1/8-inch tubing would reduce the volume, and thus the lag time, by a factor of four.
| Tubing OD (inches) | Typical ID (inches) | Volume per 100 ft (liters) | Lag Time at 1 L/min (sec) | Lag Time at 2 L/min (sec) |
| 1/8 | 0.065 | 0.16 | 9.6 | 4.8 |
| 1/4 | 0.18 | 1.25 | 75 | 37.5 |
| 3/8 | 0.295 | 3.35 | 201 | 100.5 |
| 1/2 | 0.402 | 6.24 | 374.4 | 187.2 |
Note: Values are approximate and depend on tubing wall thickness.
The Hidden Volumes: Components that Add Delay
A common pitfall in lag time calculation is considering only the tubing. Every component adds volume. A large particulate filter housing or a water knockout pot can have a significant internal volume, sometimes equivalent to many meters of tubing. When selecting components for a gas sampling system, particularly for a fast-response application, the internal volume should be a key specification to consider.
One advanced design technique to manage this is the use of a “fast loop” or “bypass” stream. In this configuration, a high flow rate is drawn from the process and flows past the analyzer inlet, with most of it returning to the process or a vent. A much smaller flow is then drawn from this fast-moving stream into the analyzer. This ensures that a fresh, representative sample is always available at the analyzer inlet with minimal delay, overcoming the volume issues of long sample lines. This design adds complexity but is often necessary for achieving the response times required in modern process control.

Mistake #3: Improper Pressure and Flow Control
The journey of a gas sample from a high-pressure process line to a delicate analytical instrument is one that requires careful management of pressure and flow. An analyzer is like a highly trained specialist; it can perform its task brilliantly, but only under a specific set of conditions. Presenting it with a sample that is at the wrong pressure or flowing at the wrong rate is like asking a surgeon to operate in a chaotic, unstable environment. The results will be unreliable. A robust gas sampling system must precisely regulate these two critical parameters.
The Pressure Puzzle: From Process to Analyzer
Process gases are often at high pressures, sometimes hundreds or even thousands of pounds per square inch (psi). Analytical instruments, on the other hand, typically operate at or near atmospheric pressure. The primary job of the gas sampling system, therefore, is to reduce this pressure in a controlled and predictable manner. This is the role of a pressure-reducing regulator.
However, a simple pressure drop can introduce a complex problem known as the Joule-Thomson effect. When a real gas (as opposed to an idealized theoretical gas) expands rapidly as it passes through a regulator, its temperature changes. For most gases at typical process conditions, this results in cooling. If the gas contains condensable components, this cooling can be dramatic enough to drop the gas temperature below its dew point, causing liquids to form inside the regulator. This condensation alters the sample composition and can damage the regulator itself.
Think about using a can of compressed air to clean a keyboard; after a few seconds of continuous use, the can becomes noticeably cold. This is the Joule-Thomson effect in action. To counteract this in a gas sampling system, regulators often need to be heated. By keeping the regulator’s temperature well above the sample’s dew point, we can ensure that the pressure is reduced without any phase change, preserving the integrity of the gas sample. Selecting the right regulator and deciding whether it needs to be heated is a non-negotiable step in proper system design.
Flow Control: Not Too Fast, Not Too Slow
Once the pressure is managed, the flow rate to the analyzer must be precisely controlled. Every analyzer has an optimal flow rate specified by the manufacturer. This is the rate at which it provides the most accurate and stable readings.
- Too slow a flow increases the lag time, as we’ve discussed. It can also lead to increased interaction between the sample and the tubing walls, exacerbating adsorption issues for reactive gases.
- Too fast a flow might not give the analyzer’s sensor enough time to properly equilibrate with the sample. It can also cause pressure fluctuations within the analyzer’s measurement cell, leading to noisy and unreliable readings.
The goal is to achieve a “Goldilocks” flow—just right. This is typically accomplished using a flowmeter in conjunction with a needle valve or a mass flow controller. A common and robust design places the flowmeter at the end of the sample path, just before the vent. This configuration is less susceptible to pressure fluctuations and provides a true indication of the flow passing through the analyzer. The flow must be constant and non-pulsating. Pumps used in the gas sampling system, such as diaphragm pumps, must be chosen carefully to avoid introducing flow pulsations that would upset the analyzer.
The Role of Regulators and Flowmeters
The heart of pressure and flow control lies in two key components: the regulator and the flowmeter.
A pressure-reducing regulator is not a simple valve. It is a dynamic device that uses a diaphragm or piston, a spring, and a sensing element to maintain a constant outlet pressure even as the inlet pressure fluctuates. The choice of regulator depends on the required pressure drop, the materials needed for chemical compatibility, and whether heating is required to overcome the Joule-Thomson effect.
A flowmeter provides the visual or electronic feedback needed to set and monitor the flow rate. Simple variable area flowmeters (rotameters) are common and provide a visual indication of flow. For more critical applications, a mass flow controller (MFC) is used. An MFC is a sophisticated device that automatically measures and controls the mass flow rate of a gas, compensating for changes in temperature and pressure to deliver a truly constant flow to the analyzer. While more expensive, MFCs provide a level of stability and precision that is often essential for high-performance gas analysis systems.
Designing the pressure and flow control portion of a gas sampling system requires thinking about the system as a whole. The regulator, flow controller, and any pumps must work in harmony to deliver the sample to the analyzer’s doorstep under the exact conditions it expects.
Mistake #4: Inadequate Sample Conditioning
A raw gas sample extracted from an industrial process is rarely clean. It is often a mixture not just of different gases, but also of solid particulates (dust, soot, rust) and liquid aerosols (droplets of water, oil, or chemicals). Sending this “dirty” sample directly to an analyzer would be like pouring muddy water into a high-performance engine. It will quickly clog, corrode, and destroy the delicate internal workings of the instrument. Sample conditioning is the crucial step of cleaning the sample, removing these interfering substances so that only the pure gas phase is presented for analysis. Neglecting this step is one of the most common causes of analyzer failure and downtime.
Filtration: Removing the Unwanted Solids and Liquids
The first line of defense in sample conditioning is filtration. The goal of filtration is to remove solid particles and liquid droplets that could harm the analyzer. There are two primary types of filters used in a gas sampling system, and their roles are distinct.
- Particulate Filters: These are designed to capture solid particles. They work like a microscopic sieve. The filter element, often made of sintered metal, ceramic, or glass fiber, has pores of a specific size (e.g., 2 microns). Gas can pass through, but particles larger than the pore size are trapped. These filters are essential for protecting all downstream components from abrasion and clogging.
- Coalescing Filters: These are more sophisticated filters designed to remove liquid aerosols. As the gas flows through a dense matrix of borosilicate glass microfibers, the tiny liquid droplets collide with the fibers and with each other. They merge, or “coalesce,” into larger droplets. These larger droplets become too heavy to be carried by the gas stream, and they drain down to the bottom of the filter housing, where they can be removed through a drain port. A coalescing filter is critical in any application where liquids are expected in the sample stream.
The selection and placement of filters are critical. A primary, coarse filter is often placed at the sample probe to remove the bulk of the particulates right at the source. Finer filters are then placed further downstream, closer to the analyzer, for final polishing of the sample.
| Conditioning Technique | Target Contaminant | Principle of Operation | Common Application |
| Particulate Filter | Solid particles (dust, rust) | Mechanical sieving through a porous element. | General purpose protection for all components. |
| Coalescing Filter | Liquid aerosols (water, oil) | Small droplets merge into larger ones on fiber media and drain. | Removing entrained liquids before the analyzer. |
| Sample Cooler | Condensable vapors (water) | Chilling the gas below the vapor’s dew point to condense and remove it. | CEMS, where a dry basis measurement is required. |
| Heated Line | Condensable vapors (water, acids) | Keeping the sample temperature above the dew point. | Measuring H₂O, SO₃, or other high dew point compounds. |
| Permeation Dryer | Water vapor | Selective permeation of water molecules through a membrane. | Providing a very dry sample for sensitive analyzers. |
Temperature Management: Heaters and Coolers
Beyond filtration, managing the sample temperature is a powerful conditioning tool. The strategy—heating or cooling—depends entirely on what you are trying to measure and what you are trying to remove.
Heating the sample with heated sample lines and components is the strategy when the component of interest is itself condensable. Consider measuring sulfur trioxide (SO₃) in a flue gas stream. SO₃ has a very high dew point and will readily combine with water to form sulfuric acid mist. To measure it accurately, the entire gas sampling system, from the tip of the probe to the inlet of the analyzer, must be maintained at a high temperature (e.g., 180 °C) to keep the SO₃ in the gas phase. This is known as a hot/wet extractive system.
Cooling the sample, on the other hand, is the strategy when you want to remove a condensable component that would otherwise interfere with the measurement. The most common example is water vapor. Many analyzers, particularly those using infrared sensors to measure gases like CO, CO₂, or SO₂, are cross-sensitive to water. The presence of water vapor can bias the reading.
In these cases, the gas sampling system will include a sample cooler (often a thermoelectric or Peltier cooler) to chill the gas to a low, stable temperature (e.g., 4 °C). This condenses out the vast majority of the water vapor, which is then removed. The analyzer then measures the target gases on a “dry basis.” This is a common approach for many continuous emissions monitoring systems (CEMS).
The choice between a hot/wet and a cool/dry system is a fundamental design decision that must be made based on the chemistry of the application. An attempt to measure a condensable component with a cool/dry system is doomed to failure, just as trying to make a dry basis measurement without properly removing water will lead to inaccurate data.
Mistake #5: Selecting Incompatible Materials
The long-term reliability of a gas sampling system is profoundly influenced by the materials from which it is constructed. As we have touched upon, a gas sample can be a chemically complex and aggressive mixture. The choice of materials for tubing, fittings, regulators, and filter housings is not a trivial detail; it is a critical design parameter that dictates the system’s accuracy and lifespan.
Selecting a material that is incompatible with the sample stream can lead to a cascade of problems, including sample contamination, component failure, and inaccurate analysis. It is a mistake that often reveals itself slowly over time, through drifting readings and frequent, unexplained maintenance issues.
Material Science for Gas Sampling
The world of materials science offers a vast palette of options, but for gas sampling, a few key players dominate.
- 316 Stainless Steel (316SS): This is the workhorse of the industry. Its combination of chromium, nickel, and molybdenum gives it good general corrosion resistance, high strength, and reasonable cost. It is suitable for a wide range of applications involving non-corrosive or mildly corrosive gases like natural gas, nitrogen, and CO₂. However, it is vulnerable to attack from wet chlorine, hydrogen sulfide, and other aggressive compounds.
- Specialty Alloys (Hastelloy, Monel): When 316SS is not sufficient, engineers turn to more exotic, nickel-based alloys. Hastelloy C-276 offers outstanding resistance to a wide variety of corrosive media, including strong oxidizing acids and wet chlorine gas. Monel is particularly well-suited for handling fluorine and hydrofluoric acid. These materials are significantly more expensive, but their use is non-negotiable when the process chemistry demands it.
- Treated Surfaces (e.g., SilcoNert): Sometimes, the problem is not corrosion but adsorption. For measuring trace levels (parts-per-million or parts-per-billion) of active compounds like sulfur species or ammonia, even the surface of high-grade stainless steel is too “sticky.” In these cases, components can be treated with a process that fuses an inert layer of silicon into the metal surface. These inert coatings, such as SilcoNert, create an extremely non-reactive surface that prevents sample molecules from adsorbing, ensuring a fast and accurate response from the analyzer.
- Polymers (PTFE, PFA, FKM): For tubing and seals, polymers are often used. Polytetrafluoroethylene (PTFE) and Perfluoroalkoxy (PFA) offer excellent chemical resistance and low surface adsorption. Fluoroelastomers like Viton (FKM) are common for O-rings and seals. However, not all polymers are equal.
The Pitfalls of Polymers and Elastomers
While polymers can be excellent materials, they also have a dark side: permeation and absorption. Unlike solid metal, some gases can physically pass through the matrix of a polymer tube or be absorbed into it. This can be a source of measurement error. For example, if you are sampling for trace oxygen and use a tube material that allows oxygen from the ambient air to permeate through its walls, your reading will be artificially high.
Similarly, elastomers used for O-rings and regulator diaphragms can absorb components from the sample stream. When the sample composition changes, these absorbed components can outgas, contaminating the new sample. This “memory effect” is particularly problematic in systems that are used to measure different streams sequentially. The selection of seal materials requires careful checking of chemical compatibility charts to ensure they are resistant to all components in the gas stream, including solvents or cleaning agents that might be used.
A Case Study: The Trouble with Measuring Low-Level H₂S
Let’s consider a practical case: measuring 10 ppm of hydrogen sulfide (H₂S) in a natural gas stream for quality control. An engineer, in a hurry, constructs a gas sampling system using standard 316 stainless steel tubing and a regulator with a neoprene diaphragm.
Initially, the analyzer reads 0 ppm, even though the process is known to contain H₂S. What is happening? The highly reactive H₂S molecules are adsorbing onto the active sites on the surface of the stainless steel tubing and reacting with the iron. They are also being absorbed by the neoprene diaphragm. The gas sampling system is acting like a sponge, soaking up the H₂S before it can reach the analyzer.
After several hours, the reading on the analyzer slowly begins to creep up as the surfaces become saturated. The next day, the process is shut down, and the stream should contain 0 ppm H₂S. However, the analyzer continues to show a reading of 2-3 ppm for many hours. The H₂S that was absorbed into the system’s components is now slowly outgassing, creating a false positive reading.
The solution would have been to use tubing and components treated with an inert coating like SilcoNert and to select a regulator with a diaphragm made of a more resistant material like Hastelloy or stainless steel. This case illustrates how a poor material choice, even for a seemingly simple application, can render a very expensive gas analyzer completely useless.

Mistake #6: Overlooking Maintenance and Accessibility
A gas sampling system, no matter how brilliantly designed from a chemical and physical standpoint, will eventually fail if it cannot be maintained. Components wear out, filters clog, and calibrations drift. A design that treats maintenance as an afterthought is a design that is destined for a short and troubled life. The human element—the technician who must service the system, often in a challenging industrial environment—must be at the forefront of the designer’s mind.
A system that is difficult, unsafe, or time-consuming to service will simply not be serviced correctly or on time. The result is a slow degradation of performance until the system is no longer providing reliable data.
Designing for the Human Element
Empathy for the end-user is a hallmark of good engineering. When designing a gas sampling system, one must mentally walk through the maintenance procedures.
- Are the filter housings located where a technician can easily reach them without needing a ladder or contorting into an awkward position?
- Can a filter element be changed without shutting down the entire process? This might require installing isolation and bypass valves.
- Are pressure gauges installed at key points to help a technician diagnose a problem, such as a clogged filter (indicated by a large pressure drop) or a failing regulator?
- Is the layout of the components logical? Can a technician easily trace the sample path from the probe to the analyzer? Clear labeling of components and lines is not a luxury; it is a necessity.
A common failure is to pack components too tightly into an enclosure to save space. While this may look efficient on a computer screen, it can create a maintenance nightmare. If a technician has to remove three other components to access a single valve, the time and frustration involved increase dramatically. Providing adequate space and a logical layout is an investment in the long-term reliability of the system.
The Lifecycle of Consumables: Filters, Seals, and Sensors
Every gas sampling system contains consumable parts that have a finite lifespan. Filter elements are the most obvious example. They are designed to be sacrificed to protect the more expensive components downstream. A critical part of the design and commissioning process is to establish a baseline for how often these consumables will need to be replaced. This will vary greatly depending on how “dirty” the process stream is.
The design must facilitate this replacement. Using filter housings with quick-release mechanisms, for instance, can turn a 30-minute job into a 5-minute job. O-rings and seals in regulators and valves also degrade over time, especially in chemically aggressive service. The system documentation should specify the materials and part numbers for all these seals and provide guidance on their expected life. For some analyzers, the sensors themselves are consumables with a defined lifespan. The system design must allow for easy access to replace, and subsequently calibrate, these sensors. Neglecting to plan for this lifecycle management is like buying a car and never planning for oil changes or new tires.
Implementing a Proactive Maintenance Schedule
A well-designed gas sampling system should be delivered with a recommended preventative maintenance (PM) schedule. This is not a generic document; it should be tailored to the specific application. This schedule forms the basis of a plant’s asset management strategy for the analytical system.
A typical PM schedule would include tasks at different frequencies:
- Daily: Check pressure and flow readings for any deviation from the norm. Visually inspect filter bowls for accumulated liquid.
- Weekly: Perform a leak check on the system. Introduce a zero and span calibration gas to verify analyzer accuracy.
- Monthly/Quarterly: Replace primary filter elements. Inspect and clean coalescing filter elements.
- Annually: Rebuild key components like regulators and pumps according to the manufacturer’s recommendations.
This proactive approach catches problems before they lead to a system failure. It transforms maintenance from a reactive, fire-fighting exercise into a planned, efficient activity. A robust and reliable continuous monitoring system is not just the result of a good initial design, but of a sustained commitment to this kind of proactive care.
Mistake #7: Poor System Integration and Calibration Strategy
A gas sampling system and a gas analyzer are two halves of a whole. They are a team, and like any successful team, they must communicate and work together seamlessly. A final, critical mistake is to treat them as separate, independent entities. The gas sampling system must be designed with the specific needs of the analyzer in mind, and the entire system—from the process tap to the analyzer’s digital output—must be verifiable through a coherent calibration strategy. Without this holistic integration, even a technically perfect sample conditioning system and a high-end analyzer can produce meaningless numbers.
The Analyzer is Only Part of the Equation
Every gas analyzer has a specific set of requirements for the sample it receives. These are its “inlet conditions” and are specified by the manufacturer. They typically include a range for:
- Inlet pressure (e.g., 10-15 psig)
- Flow rate (e.g., 0.5-1.0 L/min)
- Temperature (e.g., ambient, non-condensing)
- Cleanliness (e.g., filtered to 2 microns)
- Composition (e.g., maximum water content)
The sole purpose of the gas sampling system is to take the sample from its state in the process and transform it to meet these inlet conditions precisely and consistently. A failure to match these requirements is a common integration error. For example, feeding a sample at 20 psig to an analyzer designed for 10 psig can cause internal leaks or damage to the measurement cell. Similarly, allowing trace amounts of a corrosive gas to reach an analyzer not designed for it can permanently poison the sensor. The design process must start with the analyzer’s data sheet and work backward, ensuring every component of the gas sampling system contributes to meeting those inlet specifications.
Calibration Gas Injection: The Point of Truth
How do you know if your analytical system is telling the truth? The answer is calibration. Calibration involves introducing a gas of a known concentration (a certified calibration standard) and adjusting the analyzer to read that correct value. However, where you introduce this gas is of paramount importance.
A common shortcut is to disconnect the sample line and inject the calibration gas directly into the analyzer’s inlet port. This action calibrates the analyzer, but it does not verify the performance of the gas sampling system. It completely ignores any potential problems like leaks, adsorption in the sample lines, or incorrect removal of components in the sample cooler.
A truly robust calibration strategy involves injecting the calibration gas as far upstream in the gas sampling system as possible, ideally right at the sample probe. This is often called a “probe-end calibration.” By letting the calibration gas travel through the exact same path as the process sample—through the filters, heated lines, coolers, and regulators—you are verifying the integrity of the entire system.
If a reactive gas like ammonia is being adsorbed onto the tubing walls, a probe-end calibration will reveal this as a slow response to the calibration gas. A simple analyzer calibration would miss this problem completely. Designing the appropriate injection ports and valve systems to facilitate this system-level calibration is a hallmark of a well-integrated design.
Data Validation and Alarms
The final piece of integration is connecting the analyzer’s output to the plant’s control system (DCS or PLC) and to the human operators. The system must not only produce a number but also provide context and alerts. This involves setting alarm levels. For example, a low alarm might indicate a process inefficiency, while a high alarm might trigger an automated shutdown procedure for safety.
Furthermore, the system should have diagnostic alarms. A “flow low” alarm could indicate a clogged filter. A “cooler fault” alarm could warn that the system is no longer removing water correctly, and the analytical data is therefore suspect. This “smart” functionality transforms the gas sampling system from a passive conduit into an active part of the plant’s control and safety infrastructure. This level of integration ensures that the data is not just accurate but is also trusted and actionable by the operators who rely on it to make critical decisions every day.
Related Products


The design of a gas sampling system is a discipline that marries chemistry, physics, and practical engineering. It demands a perspective that sees the system not as a collection of pipes and valves, but as a scientific instrument tasked with a single, vital mission: to deliver a representative sample. We have journeyed through seven critical mistakes, each a deviation from this core mission. From ignoring the fundamental nature of the gas to neglecting the human element of maintenance, these errors all stem from a failure to appreciate the system’s complexity and its pivotal role in the overall measurement process.
To build a system that is accurate, reliable, and durable, one must think like a scientist. One must question the assumptions, calculate the lag times, anticipate the phase changes, respect the chemical reactivities, and plan for the entire lifecycle of the system. The reward for this diligence is not merely a functioning piece of hardware, but the generation of data that is trustworthy. In the world of industrial processes, where safety, efficiency, and compliance are paramount, trustworthy data is the foundation upon which sound decisions are built. A well-designed gas sampling system, therefore, is an indispensable asset, quietly ensuring the integrity of the information that drives modern industry.
More Resources
-
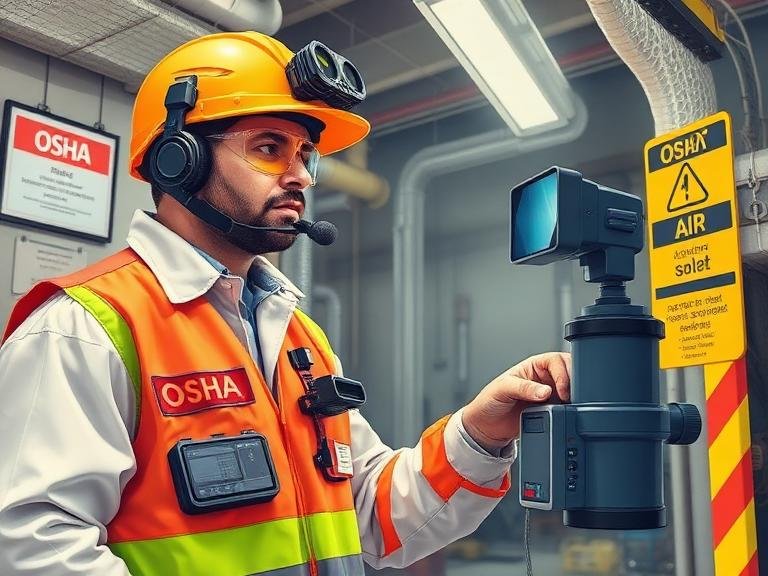
The Expert Guide to OSHA Requirements for Confined Space Air Monitoring
Navigating the complex landscape of industrial safety is a critical responsibility for any plant manager, safety officer, or environmental health professional. Among the…
-
Does Chlorine Reduce pH in Pool?Owner Needs to Know in 2026
Does chlorine reduce pH? This issue remains at the core of water quality management when maintaining a clear and transparent swimming pool. Many…
-
7 Best portable carbon monoxide detector for International travel
Carbon monoxide (CO) is a silent, invisible, and lethal threat that claims thousands of lives globally every year. For the international traveler, the…
-
7 Best Sensor Gas Detector Systems for Industrial Safety in 2026
By Sino-Inst — Industrial Instrumentation Experts In modern industrial environments, the margin for error when managing hazardous gases is absolutely zero. Whether you…
-
What Best Gas Detectors Do Fire Departments Use?
Introduction to Fire Service Gas Detection When lives are on the line and seconds count, first responders cannot rely on guesswork. Identifying hazardous…
-
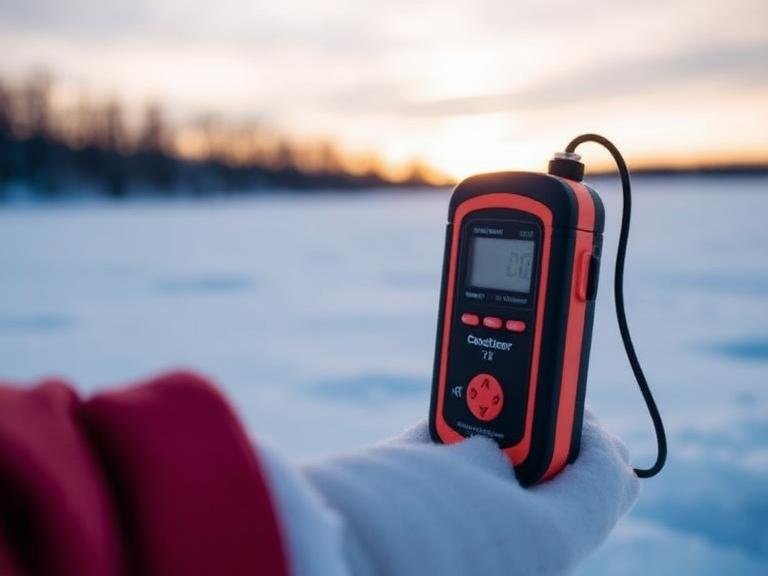
Top 10 Portable Carbon Monoxide Detector for Ice Fishing
Authored by Sino-Inst. We are a leading manufacturer and supplier of professional gas detection, flow measurement, and industrial instrumentation solutions. With decades of…